
In this guide, we will be using Next.js. If you're working with a different supported framework, you can find instructions on how to define a workflow endpoint in the quickstarts.
If you're new to Upstash Workflow, it's a good idea to start by exploring the Local Development documentation. This guide will help you set up and use Upstash Workflow in a local environment.
Installation#
First, create a new Next.js project with:
Then, install the following packages:
Start the development server#
Since you are using @upstash/workflow, set QSTASH_DEV=true in your .env.local file and the SDK will download, start, and connect to a local QStash development server automatically — no tokens or signing keys to copy over. Add your OPENAI_API_KEY alongside it:
For manual setup, custom ports, and the registerQStashDev() helper for Next.js edge routes, see the Development Server guide.
Define an endpoint#
Next, we will define the endpoint to run the agent.
You can refer to the documentations for defining a workflow endpoint and the Agents API features to learn more.
Calling the Endpoint#
To run the endpoint, first run the Next.js app with:
Then, we call the endpoint using the Workflow Client:
If you are using a local tunnel, replace the url above (http://127.0.0.1:3000)
with the public URL.
In the console where you run the Next.js app, you should see logs like this:
If you run the same endpoint using a local tunnel, you can also see how Upstash Workflow runs the agent in steps:
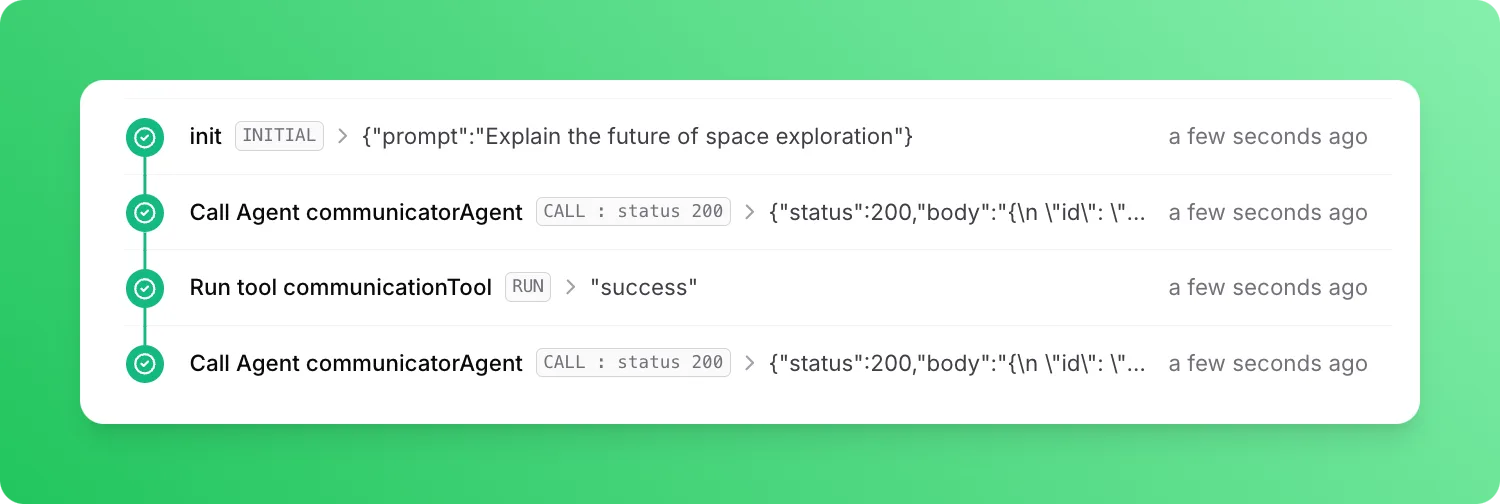
Each tool invocation and LLM call is a seperate step. Our agent first made a call to OpenAI to decide whether to use a tool or reply right away. OpenAI responded with a request to use the tool communicationTool. Tool was executed and OpenAI was called with the result of the tool. OpenAI then responded with the final response.